How to Create and Record Your Presentation
These instructions will help guide you through the process of creating and recording your individual presentations, which will then be included in the virtual proceedings.
As a presenter at vSNE, your individual presentation video is required to be the following length:
Oral presenters: 15 minutes (maximum)
Poster presenters: 3 minutes (maximum)
Poster spotlight presenters: please use the same presentation as your poster video
Below are some guidelines and pointers on how best to video your presentation and send to the organizers in advance of your talk.
The deadline for sending your completed video is September 9, 2020 at 23:59 PDT.

Step 1: Create your Presentation using PowerPoint Slides
Please download the vSNE intro slide below to include as the title slide at the beginning of your presentation (include the title of your talk, your name and your affiliation)
Ensure that any graphs/charts/figures you include are large enough to be viewed on a screen
Practice going through your talk to confirm that the timings are accurate, and that the number of slides correlates with your allotment of time (15 minutes for oral presentations, 3 minutes for posters and poster spotlights). Remember to take a few moments at the start of your talk to introduce yourself, in lieu of a chair.
You may consider including a contact email address and/or twitter handle in your final slide, to make it easy for attendees to contact you with any follow up questions post event.
Step 2: Record Your Video
To record your presentation, you are welcome to use any platform you feel comfortable with (as long as the final file is in mp4 format). We have outlined instructions for two options, which are both user-friendly and free to use. Please click on the button below to review these options:
OPTION 1: ZOOM (preferred option)
Please click here to view the ‘recording a zoom meeting’ video. Further step by step instructions are included below:
- Open the slides you wish to present, then minimise.
- Install the Zoom.us software or application on your computer or device from http://zoom.us/download. Once the application has installed, click Sign In (for existing account users) or Sign up to create a free account.
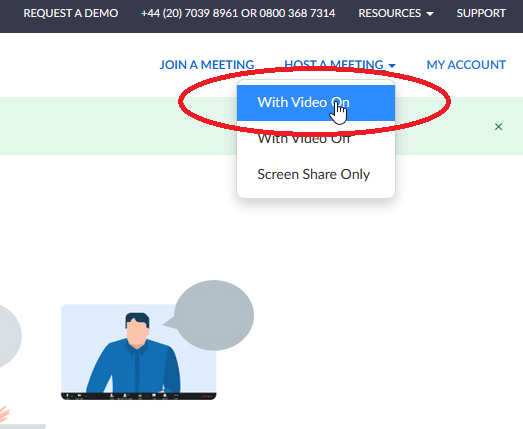
- Once logged in, click on the ‘Host a Meeting’ tab at the top and select ‘With Video On. Then click ‘open link’.
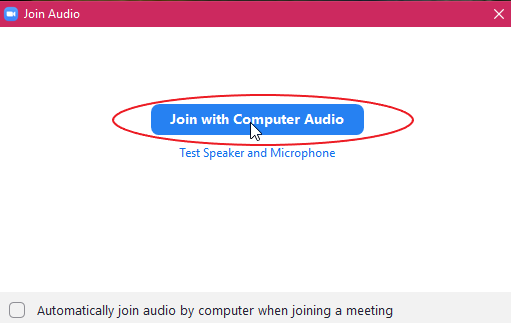
- The meeting will then launch, and you will be asked to ‘join with computer audio’.
- If your audio isn’t working, check your settings by clicking on the arrow next to the mute icon on the bottom left of the screen.

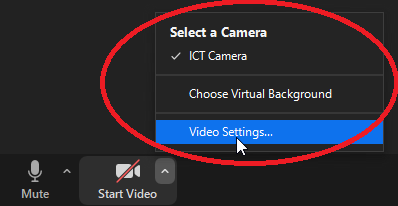
- If your video isn’t working, check your settings by clicking in the video icon at the bottom left of the screen.
- Once you are in video mode and can see yourself on your computer monitor, make any changes required to the location/orientation of the camera etc., to ensure your appearance is how you would like to be recorded.
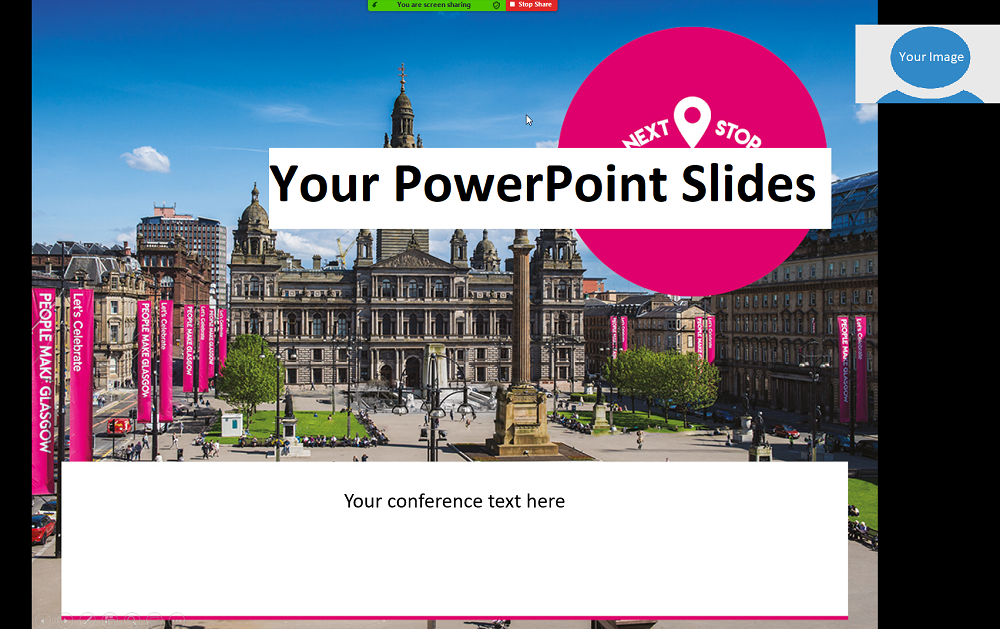
- Move your mouse to the bottom of the screen, where the following will appear. Click on the share screen icon and select the PowerPoint slides that you opened previously.

- Once you have shared your screen, you should be able to see yourself in the top right of the screen, with the main image being your slides. Click next through the slides to make sure you have control over the content.
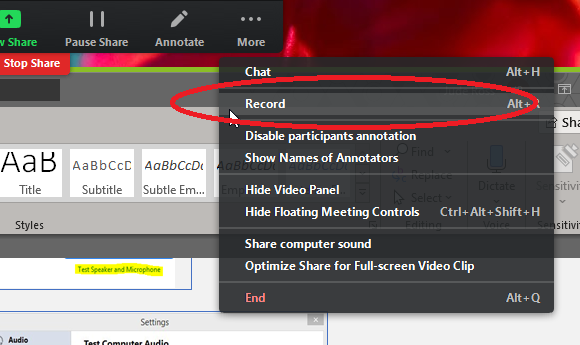
- Once you are ready, go to the top of the screen, and click on the ‘More’ button, where you will then see the ‘record’ button. Click on this to start the recording.
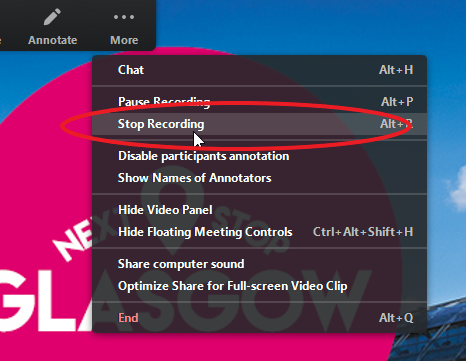
- Once you’ve finished your recording, go back up to the same ‘more button’ and click ‘Stop Recording’ (please note that this tab won’t show up on the recording).
- As soon as you end the meeting, your zoom video clip will download and appear in your documents folder in a folder named ‘Zoom’.

- Once you are happy with your recording, please rename your final video [SESSION ID_LASTNAME].
OPTION 2: Microsoft PowerPoint
Please click here to view a brief ‘How to Make a Video in PowerPoint’ video. Further step by step instructions are included below:
- Go to the video and audio settings on the device you plan to record your presentation, to ensure your microphone and camera are connected and working properly.
- Open the PowerPoint slides you wish to present.
- Whether you are using Mac or PC, there will be a ‘record slide show’ button, under the slide show tab.

- Once you have clicked on the record slide show, you will see the below view, with your Ppt slides in present mode, with your image at the bottom right of the screen. Once you are ready to present, you simply click on the red record button located at the top left of the screen.

- If you wish to highlight any graphs or specific information, you can do so using the tools at the bottom of the screen.

- Once you are finished recording your presentation, click on the stop button at the top left of the screen, beside the record button.
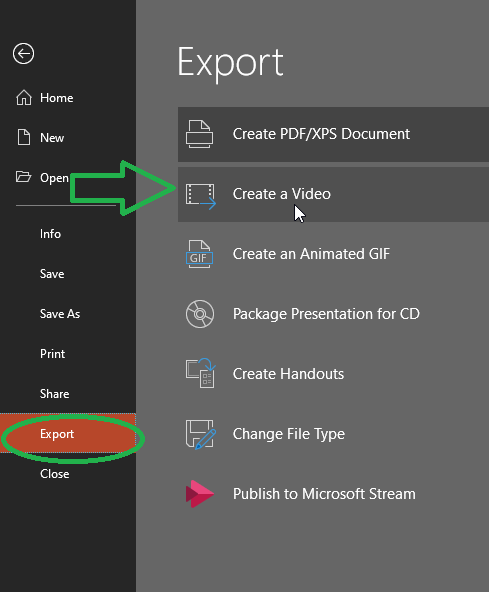
- Once you are satisfied with your recording, please go to file -> export -> create a video, to save your presentation as an mp4 video file.
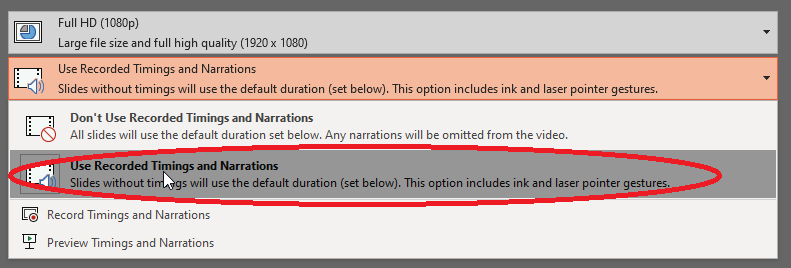
- Ensure you select the ‘use recorded timings and narrations’ to save your video. Once you are happy with your recording, please name your final video file [SESSION ID_LASTNAME].
Step 3: Upload your video for presentation
Please upload to the required folder by 23:59pm PDT, September 9
Poster presenters must upload all videos and documents directly to their “poster booth” on the virtual platform via their individual url (this will be communicated via email)
Poster spotlight presenters must upload all videos via an individual link that will be communicated via email. Please contact us if you encounter any issues
Oral presenters must upload all videos via an individual link that will be communicated via email. Please contact us if you encounter any issues